 |
|
|
|
 |
|
|
|
|
Masking and 2-toning
|
|
|
|
|
|
|
|
|
How to apply a 2-tone paint job? It's an often asked question with many possible answers. I don't have all of the answers, and guys like Steve Boutte and Bob Downie are much better painter's than I, but I will present my techniques here.
A few general guidelines that I like to follow:
1. Whenever possible, use lacquer for the base color and an enamel for the second color. This makes it much easier to repair a mistake. Mineral spirits can be used to remove excess enamel without harming the lacquer.
On to the paint job!
I wasn't thinking of a how-to when I started this paint job, so the second color has already been applied in these shots. Though I am a proponent of airbrushes, this paint job was done entirely with rattle cans.
The specifics:
This car is an AMT/Ertl 1966 Chevy Nova. The mold lines were cleaned up and the emblems removed as this will not be a replica stock car anyway.
The cleaned up body was primed with PlastiKote sandable gray primer. After thoroughly drying, the primer was wet sanded with 800 grit paper to smooth out any orange peel. The 800 grit will remove the orange peel and leave a bit of tooth for the paint to adhere too.
The base coat is Duplicolor "Orange Mist". It was applied in 4 light coats, wet sanded with 1200 grit paper after the second coat to keep things smooth.
The masking procedure:
Again, I didn't take pictures of the masking going on to the body, but I think the pictures will show how it was done.
This particular car was masked with Scotch brand transparent tape.
Regular masking tape can be used, but it tends to have a rather ragged edge for modeling. This can be improved, however, by using a sharp #11 Exacto blade and trimming the factory edge from the tape. I prefer to lay yhe tape down on a mirror and, using a straightedge, trim the tape into narrow strips. By modifying an Exacto knife to hold 2 blades, you can make very narrow strips with a nice, clean edge. Sticking the tape to the mirror will reduce the tack of the tape, but not to the point of making it unusable. In fact, removing some of the adhesive can actually be helpful with cheap masking tape.
Tamaiya has a very nice masking tape, but I didn't have any myself. Bare Metal foil can also be used for masking. Bare Metal works very nicely, but I find it a bit expensive for masking. The same is true of frisket film, available from an art supply store.
 | Figured out where you want the seperation line to occur on the body. You can mark it if you'd like, I would recommend using a light pencil mark slightly away from the desired mask like. That would allow the mark to stay on the base color and would not affect the painting of the second color. Lay the tape along the body, following the contours as desired. If you simply want a straight color seperation, you can adhere the tape to one end of the body and pull it taut before adhering it to the other end. After you have the tape positioned where you want it, start burnishing it gently, but firmly, to the body of the car. A soft, lint-free cloth can be used here to help keep fingerprints off the painted surfaces. | |
| Special care is needed around door handles and such. These areas can be a great place for the paint to bleed under, if care is not taken. As long as there is a sharp line for the seperation, you can make slits in the tape to allow it to better conform to these areas. Just make sure to cover the slits with another layer of tape before painting. You only want one layer of masking along the seperation line, as the paint will collect next to the masking and, if the masking is thick the seperation line will be as well. | 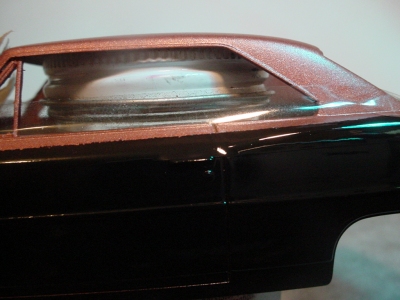 | |
 | Once the seperation line is masked satisfactorily, the rest of the car can be covered to keep the 2-tone where you want it. In most cases, I will continue up the body of the car with clear tape and, finally, I cover the roof (if it's not being painted) with a layer of paper or masking tape. Do not use newspaper for masking! The solvents in the paint can actually leech into the ink used for printing and transfer the text to your base color. Then again, that may be a nice special effect depending on the look you are going for. Plain white copier or printer paper will do the job nicely, as would any specialized masking paper you might have. | |
| Now it's time to spray the second color, after going over the surface with a tack cloth, of course. Apply a coat of either clear or the base color, as discussed above, if you like. I think it really helps keep the seperation sharp. There are no real special techniques here. Just keep the paint somewhat thin near the seperation line, and don't apply paint anywhere it isn't needed. Applying paint a distance away from your seperation line, such as the roof in this case, increases the chances of the second color bleeding through the masking. It also makes the model more difficult to handle when removing the masking. Applying a heavy coat of paint right along the seperation line also increases the risk of bleed through and may make the line unnecessarily thick.Depending on the second color's coverage, a couple of coats should do the trick. | 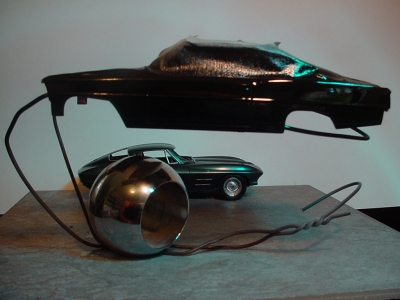 | |
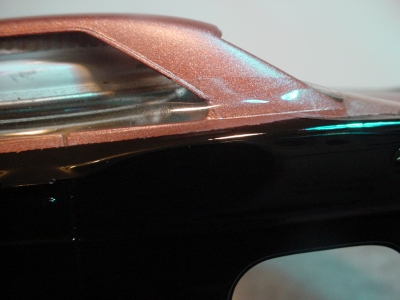
 | Now for the tricky part! I prefer to start removing the masking before the last coat is dry. I give the paint a few minutes to gas off and become tacky, but not to dry. Working very carefully, start removing the mask in the reverse order that it was applied - last piece on = first off. The seperation line will be the last part removed. When removing the seperation line, pull the tape back at an angle, bending it slightly back over itself. About a 45 degree angle from the surface works nicely. Work quickly, but carefully, and be very careful not to allow any wet paint to touch the base color and keep the masking material out of the wet paint. I learned that the hard way, dragging the tape thought the wet paint makes for a very hard to repair imperfection in the paint. | |
| The seperation line, while not perfect, should turn out nice and sharp.... | 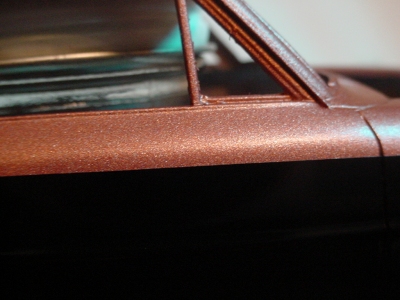 | |
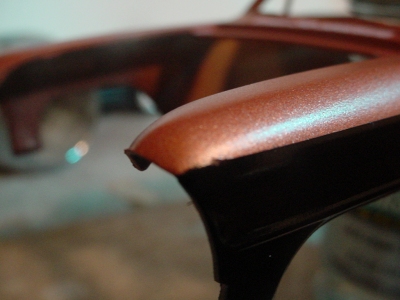 | ...though, sometimes, imperfections do occur. By using lacquer for the base color and enamel for the secondary color, these imperfections can be removed with mineral spirits without damaging the lacquer. Using enamel over enamel, or lacquer over lacquer would make something like this a minor diaster. A bit of buffing might remove the offending paint, in some cases. In other cases, it might mean stripping the paint and starting over. | |
| In this case, the mineral spirits did the job as intended. By carefully applying mineral spirits with a fine brush, and cleaning with another fine brush, the black bleed under was removed from the base color. You only need to work on the offending area, and use a nearly dry brush to remove the paint. Stay away from the paint that you want to keep, as much as possible at least. It's a technique that requires a bit of practice, but it works. | 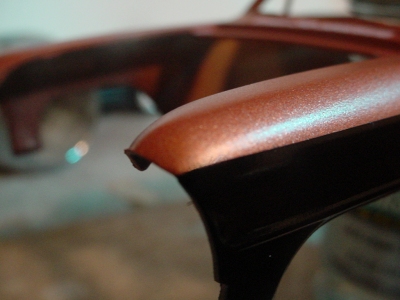 |
That's how I do 2-tone paint jobs. The most important things are:
Patience - Don't try to hurry through a 2-tone job!
Practice - Try this on a few "unimportant" projects or scrap bodies to get the hang of it.
Experimentation - While practicing this technique, try some different materials or variations on the information presented here. You may find something that works better for you than what works for me.