|
Pictures for this section will be coming, I am photographing one of my projects as it progresses. Wish me luck...if everything comes out okay, I'll have pics to put here. If not I'll have to start over. |
| This section is a brief overview of what is required to cast your own resin parts at home. I believe in starting small when it comes to resin casting. Cast some small parts first to get a feel for the materials then, if the desire strikes you, move on to larger projects. | ||||||
| For the mold: Use silicone caulk from the hardware store or Wal-Mart. GE Silicone 2 in the tube also works. Liquid latex is another option that works very nicely, available at most hobby shops, and doesn't stick to your master. | ||||||
| For casting: Devcon 2-ton epoxy works okay. I've never been able to get a fully cured part with 5-minute epoxy, it always feels sticky - even days later. | ||||||
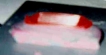
Other: Modeling clay. This is needed to make a 2-part mold. | ||||||
| ||||||
| ||||||
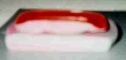
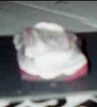
| Once you are sure it is dry, not spongy feeling at all, carefully pull the clay away from the silicone, making sure the master stays embedded in the silicone. Once the clay is removed, lightly coat the exposed master and the silicone around it with WD-40. Make sure everything on the side of the mold containing the master is well coated. Again, wait about 10 minutes before proceeding. Now, start with the silicone again, completely enveloping your master. Don't get the silicone anywhere you have not applied the WD-40. | ||||||
| Wait several more days. I recommend waiting at least 48 hours for the silicone to dry....usually more is much better. | ||||||
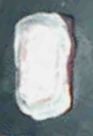
| After everthing is completely dry, it's time to remove the master. Carefully seperate the two halves of the mold and remove the master. The resulting mold should fit together nicely and have a "feed channel" to pour resin into. Be aware, though, that most epoxies don't pour very well - so this could be a bit messy. If the epoxy is thin enough to pour (mix up a small test batch first), you can clamp the mold halves together lightly and pour it into the mold. If it will not pour, carefully apply a good layer to both halves of the mold....hopefully it will allow you to build up slightly past the "full" level of the mold. Carefully mate the 2 pieces of the mold together, and clamp lightly, always making sure not to distort the mold. | ||||||
| Resin casting is an involved process, but very do-able with a bit of patience. | ||||||
| Hope this helps, without boring you to tears! |
More Info:
this is a short section of things I have been meaning to add. There is more to come.
Epoxy resins can be thinned. Hobby type casting resins or fiberglass resin can be thinned with lacquer thinner to improve their flow characteristics. Just remember that the resin will shrink proportionate to the amount of thinner added. This happens because the thinner evaporates as the resin cures. The resin will shrink a bit on its own, as well. A little thinner goes a long way.
Epoxy resins can be tinted with paint. I have successfully added Testors enamels to epoxy resin. The tinted resin will take a bit longer to cure, as the paint must dry as well. Though I haven't tried it, lacquer paints would probably not affect curing time as much, if at all.
 |