|
After the mold was cured another day without the clay master inside, I
mixed up some Bondo body filler according to the directions on the can.
The mold was filled with the body filler, making sure that all areas of
the mold were well covered. This was done to make sure there were as few
imperfections (air bubbles and such) as possible on the final part. |
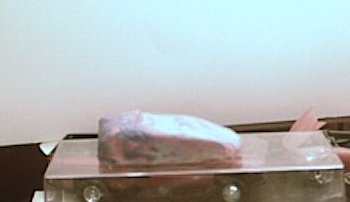
| After about 45 minutes, the Bondo was sufficiently cured to remove it
from the mold. The "overflow" of Bondo left a ragged edge around the
bottom. |
 |
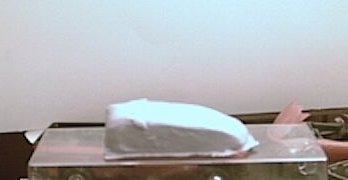 |
This shot shows a profile view, with the ragged edge still attached.
Body filler is great to work with because, until it is fully cured, it
stays a bit rubbery and is easy to trim. The ragged edge was carefully
removed with a utility knife..... |
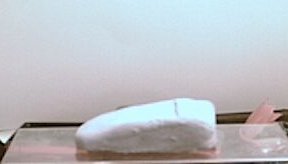
| ....leaving this. There is still a lot of cleanup left to do as my
master wasn't really smooth, but I'll admit I'm no sculptor. That is
painfully apparent from the front view.....the master, and hence the copy,
are a bit lopsided. |
  |
 |
Here's a quick "set together" shot with wheels from a Copperhead
diecast. The body needs to be sanded to get the shape closer and
smoother....as well as to even out the left and right sides. |
| So, I attacked the body with 100 grit paper. It sounds awfully rough,
but Bondo gets very hard when it cures - and hard to sand as well. At this
point a lot of material needed to be removed. The bottom surface was
flattened with 100 grit sanding screen. The screen is open and therefore
clogs much less than regular paper. The screen also seems to be very
aggressive considering the grit. |
  |
 |
A coarse file from my stash of woodworking tools was also used to get
the body into shape for the first primer coats. There is more work to be
done, but the primer coats give me a guide and improve the contrast -
making it easier to see what I'm working on. I've often found small
mistakes after the primer was applied, mistakes that were missed on bare
plastic or putty. |
| To clean up the passenger compartment, as well as try to level out the
lopsided cowl area, I used my homemade "milling machine" to remove excess
Bondo. The "mill" uses a Dremel MotoTool and a 3-axis table I picked out
of a dumpster at work. The rest of the "machine" is made from scrap wood.
It's not perfect, but it works. I hope to have the alignment better in the
near future - but that may be a moot point as I'm buying myself a drill
press for my birthday. I'll probably use the drill press as a basis for a
"mill" instead of something homemade. Then again, I may find a way to
mount my Dremel to the drill press to do the same thing.
I used a Dremel 3/8" diameter cutter to machine the Bondo. |
 |
 |
Here's the body after much more sanding and the machining of the
passenger compartment.....and yet another coat of primer.
The engine is also visible from this angle Well, that and the fact
that it wasn't there before. |
| Here you can see where the rear of the body was cut away to recess the
engine. The engine doesn't stand out much visibly, but at this point it's
fine. You really can't see the rear suspension (or what there is of it) at
all in this pic. Currently it has the differential from a Hasegawa
Mitsubishi Lancer Evo, but that will probably change.
|  |
 |
Here it is with a set of wheels pirated from a Fujimi Porsche 911.
Some sort of optical illusion makes the front tires seem taller to me.
Really, though, they are smaller than the rears.
I think I'm going to modify the "dorsal fin" into something more
like the headrests on the tonneau from an old T-bird or something. The fin
was inspired by the Grinnall.....somehow....but it just doesn't look
right. |
| This shows a bit more of the suspension and such, as well it should
since it was taken of the underside of the car. |
 |
 |
This shot shows the shape from above. |