 |
|
|
|
 |
|
|
|
|
|
|
|
|
|
|
|
|
|
Ghosting and Other Bodywork Gremlins
First in a series (hopefully) of bodywork articles

I have found that one particular mistake will cause ghosts to appear with frightening regularity. I'm not saying it is always the culprit or always going to happen, but too heavy a primer coat will bring out the big ghosts. This hood was filled with a catalyzed putty. After rough shaping, super glue was flowed onto the edges of the work to help hide them and lessen the chance of a "Bondo pop" later on. After getting the shape very close to the desired contour (with 220 grit paper) and surface finish(with 400 grit paper), I sprayed on a rather heavy coat of PlastiKote primer. It looked great.......until the primer gassed out a bit. After gassing out, there were big ugly ridges at the edges of the filled areas.
So, I sanded the hood again, knocking down the primer in an effort to exorcise the ghosts. Once it was again smooth and flat, I applied the primer again.....not quite as heavy.

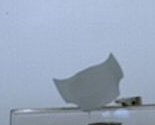
Only to be greeted by this after the primer gassed out. Not as bad, but still enough to ruin a paint job. The shinyness of the paint over the filler is somewhat distracting, look instead at the line around the edges of the shiny spot.
The hood was once again sanded smooth with 220 and then 400. This time the primer coats were applied very lightly, appropriately called "mist coats". After 3 very light coats of primer, this was the result......
The ghosts have been banished! A bit more sanding with 400 grit and it will be ready for color - with no signs (hopefully the contours are right) of the work done to it.
Summary:
I really haven't figured out how to completely avoid ghost lines, but they aren't that difficult to fix. I've found that a bit of sanding and more, lighter, coats of primer will effectively rid your bodywork of ghosts. Emblems that have been sanded away are another problem area. This usually occurs because you are removing the "skin" from the plastic, exposing a new layer. The new layer seems to be particularly succeptible to swelling from lacquer primers. As the primer gasses out, the solvents evaporate....and the swelling goes away. When the swelling goes away, the area of the emblem appears as a depression. This can be cured by either (as many experts suggest) by removing material well below the surface of the emblem and rebuilding with putty or adding another coat or 2 of primer and sanding with 400 grit paper until the surface is smooth - I'm sure there are other ways too, but I don't know them. I use method #2 as I like to avoid putty whenever possible. Duplicolor or PlastiKote "Spot Filler/Primer" helps too as it builds a bit thicker and sands wonderfully.
In case anyone is wondering, that's a Shelby Series 1 hood. I like the car, but, even though it's functional, the hood is one design element I dislike. I didn't take any before pics because this wasn't going to be a how-to until the ghastly ghost marks appeared. It was then that I grabbed the camera and attempted to take some pics.
More to come!!!