
|
Diecast Projects
Buick Rendezvous/Pontiac Aztek
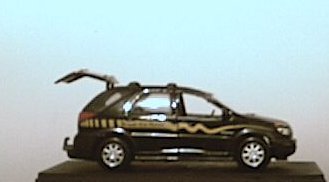 |
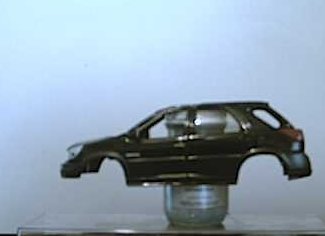
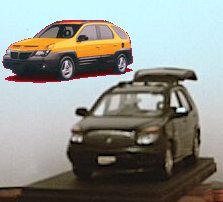
Maisto's Buick Rendezvous. Shown here out of the box.....ugly graphics and all. |
| It's really a nice looking model, shown here from the rear. | 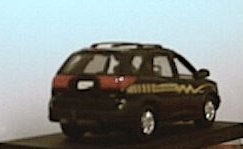 |
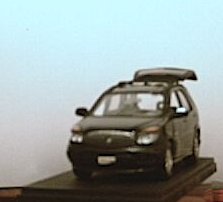 |
And the front. I've since added a flat black wash to the grille, bringing out the detail even more. |
| A bit of work with a Q-Tip and some lacquer thinner, the graphics came right off. Looks much better, don't you think? | 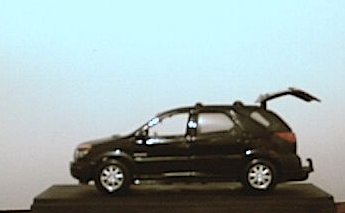 |
 |
And here it is without the chassis, grille, rear quarter windows, hatch, headlights......The reason for this state of being is I want to turn it into....... |
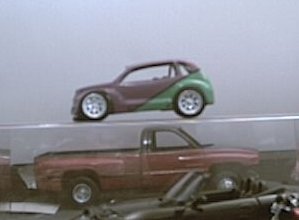
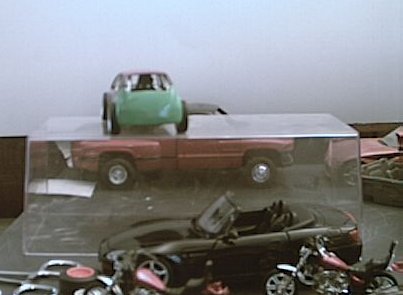
| .....a Pontiac Aztek!!! I think the Rendezvous is a much nicer looking vehicle, but it's not responsible for nearly as much controversy and criticism. | 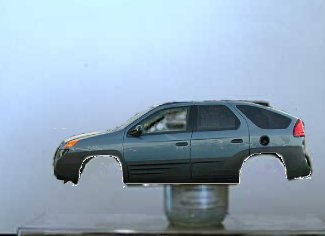 |
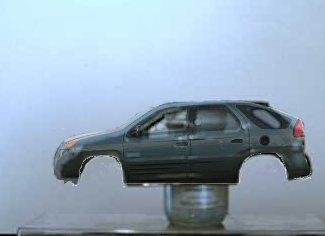 |
This pic illustrates the similarities, as well as the differences, between the profiles of the 2 vehicles. I used a pic from the PSAB Chat Room Moderator.....overlaid on my picture of a "naked" Rendezvous. |
| Here are the main differences in the profile, highlighted by the arrows. Tha Aztek's "tail" is a bit higher, the nose is a bit higher, the wheelwells are shaped slightly different and the rear of the roof is a bit shorter. I'm going to see if I can pull this one off, at this point it's just getting started.....we'll see. | 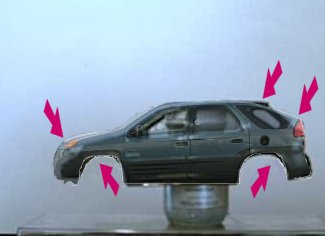 |
 |
I think the front-end treatment is going to be a bit tricky. I'll probably have to scratchbuild the majority of the front-end. |
Chrysler PT Cruiser Legend racer
| A discussion on the Hobby Heaven Message Board brought up the subject of Legends cars. It was decided that somewhere around 1/35th to 1/43rd scale would be right for duplicating a Legend car in 1/25th scale, with the real answer being 1/38th. I was looking around for pre-1948 cars in 1/43rd scale when I happened across a Maisto Power Racer PT Cruiser. I bought it (it was less than $2) and figured it would be a neat project. When I got it out of the box, I noticed it was marked as being 1/39th scale. |  |
 |
The discovery that it was 1/39th scale led to this, a PT
Cruiser Legend car. Legends cars are 5/8ths scale
representations of pre-1948 cars, powered by motorcycle engines. This one
has no engine.....but it carries a nice list of modifications. No, it's
not done yet either. After disassembly, the motor unit was disposed of, the front doors were epoxied in place and the interior disposed of (along with the "glass" and some other pieces). A Dremel Moto-Tool was used to remove the door handles, the B-pillar, some of the trim and also to open up the wheelwells for some 1/25th scale tires and wheels. |
| The panel lines and the headlight areas were filled. One great thing about diecast is you can speed the drying process of putties and paints with heat - I put mine in the oven (with only the pilot light as a heat source) before leaving for work. When I got home, about 9 hours later, the Bondo glazing putty was completely dry and ready to sand. After lots of sanding, it was primer time! Plasti-Kote "One-Coat Scratch Filler Primer" was used....3 coats. A bit more sanding and I decided to try some color.....Krylon Rich Plum. |   |
 |
I drilled the holes for the nerf bars.....and then it sat. When I returned to it, I started with the chassis. I added locators for the axles, cut new axles from aluminum rod, added a set of wheels from an AMT Parts Pack and Bridgestone tires from American SATCO. The seat is a much modified piece from an AMT racetruck. Then....it sat again for a while. The next thing to be done was to add a rollcage and some interior detail. I made a floor from Evergreen sheet styrene and the dash was cut from a Diet Pepsi can. |
| The cage was fabricated to hug the inside of the body - making it
nearly invisible - from .062 diameter solder (about 1.625" in
1/25th). The nerf bars were made from aluminum
welding rod and polished with Never-Dull. Looking at this thing one day, i decided it needed something else.....more color! The green is Plasti-Kote "Hot Rod Green" Engine Enamel. I masked it with Scotch tape and sprayed the green. While the paint was still pretty wet, I removed the masking. When I got home from work that night, I added the black stripe between the colors by hand. It's a simple little project...not very detailed, not an approved Legend bodystyle....yet it gets a lot of attention. Trust me, it looks better in person than in my pics. |
 |
Maisto Honda S2000
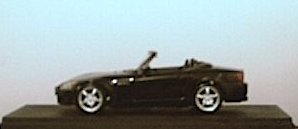 |
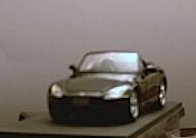
Maisto's Honda S-2000. Not much to say.....it's gorgeous. Well, the
car is gorgeous - the model is a looker and it's cheap too. Soon I am going to add some brake rotors and some wheelwell "inners" to get rid of the see-through effect. |
| Well, it could stand a bit of detail painting on the interior....I've already started on that. The taillights are painted on - I'm thinking I might be able to make up some decals for those. Don't lift the hood though.......the engine plate is for a non-U.S. model. the battery is on the driver's side, the master cylinder on the passenger's side. The rearview mirror also has to go. I replaced mine with one from a Fujimi Porsche 911, after the pics - of course. | 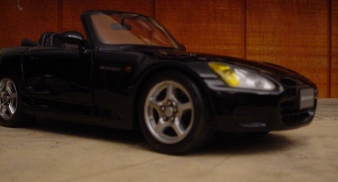 |
 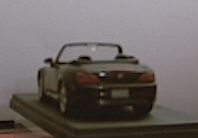 |
I've also detailed the exhaust outlets on mine....but it was done after the pics were taken. The taillights kind of ruin the rest of the model, so I'm going to have to get some decals done finally. I've had all kinds of decal ideas - but I never got around to making any. This model is certainly a justifiable case for making some decals up! I hate to go on and on about it, but everything else looks well done...........Why the painted taillights??????? |
|
|
|
|
 |